Saturday, March 7, 2015

Gold Ruffle Banner: A How-To


Over the past few years, I have made lots of banners for various weddings, showers, and other parties.  I quite enjoy them and thought I'd share a few tips about how I make my current favorite banner, which is topped by a gold tissue paper ruffle.

But first, a few overall tips for making a paper banner that will look good and hold up:
1. Use heavy cardstock.  Paper will be flimsy, potentially curl in humidity, and not look good for as long.
2. Attach the banner to thick ribbon or heavy string for strength, not necessarily looks.  You can always add a prettier layer over top of the strong one.
3. To attach the banner pieces to the ribbon or string, I recommend sewing, staples, or tying knots- no tape or adhesives.  Sewing is my favorite route.  It looks nice, is fairly fast, and is strong.  I also really like to use a stapler to attach the paper and the ribbon.  I like the look, speed, and strength.  My least favorite option is punching holes in the banner pieces and then tying knots in the strings one by one.  This is by far the most time consuming way to hold it all together, but can be a cool look.
4. Plan for the final length of the banner you desire, and take the time to do the math to find out how that corresponds to the individual banner pieces and spacing.  The extra multiplication and division is worth it instead of having a banner that is too long or too short for the purpose.
5. You will probably need more ribbon or string than you think.  Remember to leave some good tails on the ends for tying purposes.

So, here are some general steps for one of the latest ruffle banners I made.  It was for my sister, and she wanted it to say "Blessed."  I planned out seven letters and wanted it to be about four feet in length.

-Cut 8 1/2x 11" brown kraft paper cardstock in half horizontally.  Each of these will be one pennant. (size 5 1/2 x 8 1/2")

-Create a template for the bottom part of the pennant.  Trace and cut each individual piece for the banner.
-I then cut a slightly larger piece of black cardstock to go behind the brown.  I used 12x12" paper, making a perfect 6x12" piece to fit.
-Next I mapped out the letters.  Without thinking too much about it, I drew using a black marker large cursive letters with tails touching the sides.
-I then used the marker to make all of the vertical lines in the letters gradually thicker.  I left the horizontal lines alone.
-I filled in and blended the new shape to create this pretty script for each of the letters.
-I then inked the sides of the brown cardstock to give it some depth.
-And attached it to the black cardstock with double sided tape.  There was intentionally a couple of extra inches at the top for the ribbon and ruffle.   I trimmed it later once I saw how thick everything would be.
-Next I used my sewing machine and black thread to stitch 1/4" all the way around the brown paper, not only securely holding everything together, but also adding a neat detail.
-The next step was to actually connect the banner pieces together.  I only needed something to hold it that would later be covered by the ruffle, so I used this 1/4" white ribbon.  Pay careful attention to the spacing between letters.  It can be tiny or a little more, as long as you are consistent.  Only leave big gaps if you are trying to create spaces between separate words.
-Then cut the paper for the ruffles.  This is regular gold tissue paper from the wrapping aisle.  I fold it so that it will fit in my paper cutter and create 1" strips, cutting multiple layers at a time to prevent tearing.
-I pre fold a couple of pleats and then set the gold strip directly over the ribbon that I just used to sew the banner together.  Keeping that centered will mean that I am sewing the gold paper to the flexible ribbon that will give it support.  As I slowly sew, I gently pleat the paper and feed it under the presser foot. It doesn't take long to find a speed and a rhythm that allows you to sew without stopping.

-When I got to the end of a strip of gold paper, I simply pre folded a pleat and stuck it under the end of the first.  You keep sewing and can't even tell where one ends and another begins.
-Here's what the final ruffle looks like.  Don't go for perfection, because it won't show at a distance anyways.

Here's the final banner hung in my room before I sent it off to Emily.
And here it is hung up all the way in Colorado among Emily's other pretty things in her entryway:


A very similar banner was made for my dear friend Betsy's birthday this winter.  Her banner said "Be Blessed."  I know, bossy, but think of it as a birthday wish.
Another dear friend Kayla made this awesome tissue paper banner as well.  Love it!
Here we are, Katie, Kayla, Karla, and Betsy, using Karla's new selfie stick :).
And a final note about that party: Betsy made these gorgeous, detailed, time consuming, book page snowflakes.  As favors for her guests.  I love these girls.
And this last banner doesn't have a ruffle, but I love it as well.  This was a Valentine's banner made for Bonnie's mantle.  It was similar, but used triangles instead of pennants and cute chevron ribbon holding it all together. Oh, and the letters are on pages from an old hymnal, which is a fun detail.
I'll unearth a few more banner ideas from parties past and post in the coming weeks!

Tuesday, March 3, 2015

Celebrating the Brown Scapular


One exciting part of 5th Grade at my school is the honor of receiving the Brown Scapular.  The Brown Scapular is an outward sign of asking Mary's protection and guidance in knowing her Son more.  (More info on the Brown Scapular here and here and here.)  The Scapular is a Sacramental, an object or action that we use as Catholics to connect to the Sacraments and live out our faith.  Because my students receive the Scapular, I have the responsibility of preparing them.  Here are a few resources and ideas that I have used:

We decorate a bulletin board in the hallway.  One title I have used is "Mother Mary, lead us to the heart of Jesus."  This year, I used a large piece of brown paper to create a kind of mantle that said, "Mother Mary, help us love your Son more."

We surround the bulletin board with coloring pages of the Brown Scapular:

Click here for my favorite Brown Scapular coloring pages.


The bulletin board also had "St. Simon Stock and Our Lady of Mt. Carmel, pray for us!" signs made by students:

I made a giant Brown Scapular using one of the coloring pages (linked above), two sheets of brown felt, and brown yarn.  It makes a nice visual for our bulletin board:


I use this story book to prep my kids: The Brown Scapular, Catholic Story Coloring Book by Mary Fabyan Windeatt.  It is published by TAN books, but unfortunately, I don't think that it is in print any longer.  (If anyone knows of another publisher that is carrying it, please let me know.  My google searches have proved fruitless.)
I like the detail in this book, and the story of St. Simon Stock's life from childhood.  It has one page of text and then one coloring page.  My students have provided color for each of them, creating a nice book for all of us to enjoy.
(I will note that while this is a coloring book, it is not a coloring book that you can copy for your kids or students.  I do love finding a publisher that allows copies for classroom or home use, but this is not one of them.)

Incorporating several curriculum areas into one topic is a necessity for covering skills and content in my classroom, so I also created a Spelling List to go along with this Brown Scapular book.  The words are not all necessarily vocab for the book, but all follow the pattern of different ways to spell the long e sound.  Some words are easy, some are more challenging.

Click here for the list:
https://drive.google.com/file/d/0B5ETRkL51fhMVUN0bkV0RnRPbzA/view?usp=sharing
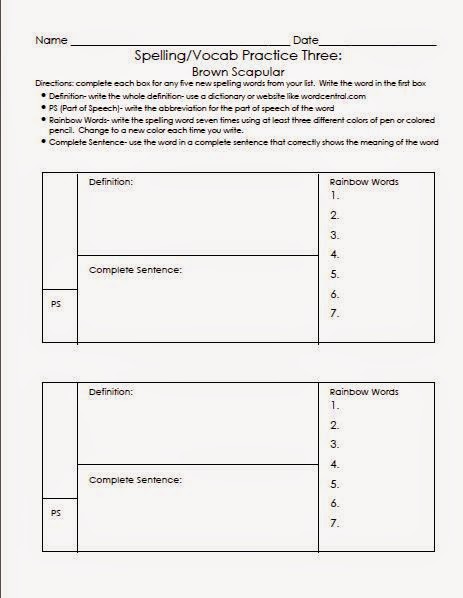
Click on the following three documents for three days of spelling practice, focusing on spelling skills as well as vocab usage:
https://drive.google.com/file/d/0B5ETRkL51fhMcTRnc2VoRlhfXzA/view?usp=sharing

https://drive.google.com/file/d/0B5ETRkL51fhMRkszRGtZWWx0TUU/view?usp=sharing

https://drive.google.com/file/d/0B5ETRkL51fhMcVN0cXpLVkprWGs/view?usp=sharing
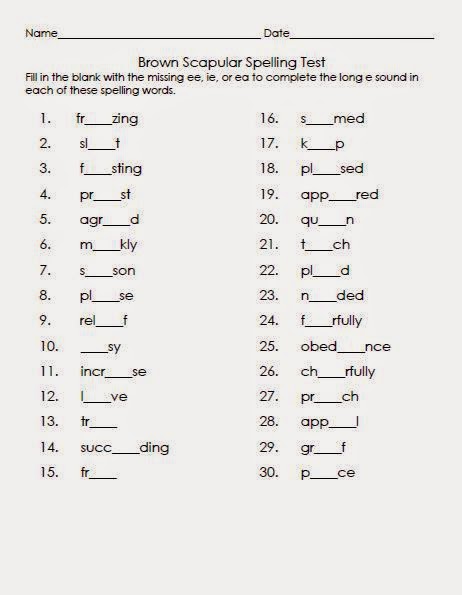
 Click here for a fill-in-the-blank spelling test:
https://drive.google.com/file/d/0B5ETRkL51fhMb2plTEUtLTk1N0E/view?usp=sharing

And finally, we ended the week with some comprehension questions over the life of St. Simon Stock, Our Lady, and the Brown Scapular.  There also is a place for the students to ask any questions about receiving the Brown Scapular without having to do it in front of the class.  Click here for the document:

https://drive.google.com/file/d/0B5ETRkL51fhMdjF3MkF4cFFOWkE/view?usp=sharing

The Brown Scapular ceremony was lovely.  The students all received the Brown Scapular, as did many of their parents.  Our priest always reminds the kids that wearing the Brown Scapular is like reminding yourself that you "are on Mary's team."  It is common to wear sports jerseys, uniforms, or matching jackets for a team or organization, and the Brown Scapular helps us see that Mary is our coach, teaching us to know her Son more and preparing us for "the game" of this life.

After the ceremony, we celebrate in two ways.  I always take a group picture and individual pictures of the kids showing their Brown Scapular.  (I use the bulletin board as a background so it is a little more apparent what they are holding out.)  We always mark important dates with photos, so I think this is a good way to continue to show the kids how important it is.


And then...we have Brown Scapular Brownies!  At 10:00 in the morning, which always makes for a fun sugar-induced rest of the school day. :)  I made this simple by baking a double batch of brownies, putting them on a tray, and stringing two pieces of brown ribbon between them.  I wrote in frosting the phrase on our scapulars "Put on the Lord Jesus Christ," and then laid a printed picture of our Lady of Mt. Carmel on the other side. (Drawing Mary in frosting is out of my skill zone.)

I hope this encourages you to consider having your kids (own or students) enrolled in the Brown Scapular, and gives you some ideas for preparing them and celebrating.  I'd love to hear your ideas as well!

Sunday, March 1, 2015

Transfigured

Transfigured.

Today's Gospel has me thinking. 

We live in a culture full of stores of self-help books and people who believe that we don't really change.  Is change possible?  Or are our habits and tendencies and pasts so deeply ingrained in us that they never really leave, but maybe are masked by outward actions?

And He was transfigured before them...*

Christ revealed the infinite on a mountaintop to Peter, James, and John.  Was He changed before them?   Yes.  Were their hearts changed as a result?  I would say yes as well. 


I can easily convince myself that I can't really change.  That I repeat the same sins over and over, that I am no closer to Christ's vision for my life today than I was yesterday, that vice continues to trump virtue.  I certainly don't feel transfigured by my routines or typically grasp a vision of heaven in everyday normalcy.  Same old, same old.

But then I remember that my faith demonstrates invisible greatness made visible in the simplest realities.

Have this attitude in yourselves which was also in Christ Jesus, who, although He existed in the form of God, did not regard equality with God a thing to be grasped, but emptied Himself, taking the form of a bond-servant, and being made in the likeness of men. *

And the two shall become one flesh; so they are no longer two, but one flesh. *

Therefore we have been buried with Him through baptism into death, so that as Christ was raised from the dead through the glory of the Father, so we too might walk in newness of life. *

While they were eating, Jesus took some bread, and after a blessing, He broke it and gave it to the disciples, and said, “Take, eat; this is My body.” *

Transfigured, before my very eyes.  Transformation that cannot be guided by any guru, book, or talk show.   I am altered in a very real way through every encounter with Christ, with every gift of grace through the Sacraments.  I can see change in those around me, change that can only be a supernatural intervention.

Isn't that what Lent is all about?  Changing our hearts to be more like His?  We might fail, we might miss the mark, but that is our human condition.  That doesn't mean that it isn't possible and that it is not what we are called to.  We can change, but only with the power of Christ within us.

Rabbi, it is good for us to be here...*


Monday, February 23, 2015

The Sound of Lent


Blessed in the wisdom of the Church, the Liturgical Seasons set the soundtrack for our days in both tone and content.  I have found it ever so helpful to compile literal itunes playlists for Advent, Christmas, Lent, and Easter.  Those songs have made me think about my music choices throughout different times of the year and how they can effect my prayer and direct my heart.  I thought I'd pull together a few of my favorite Lent musings for you here.  Unless you have made a Lenten promise about silence :) give this playlist a try:

Tuesday, February 17, 2015

Ideas for Lent

Here are links to all of the Lent resources that I have previously posted about.  Click on the pictures to go to the original post with instructions and printables.

Lent Notes Foldable:
http://looktohimandberadiant.blogspot.com/2014/03/lent-notes-foldable.html

Lent Word Cloud printable:
http://looktohimandberadiant.blogspot.com/2014/03/lent-word-cloud.html

What does Lent Look Like?  Printable coloring page:
http://looktohimandberadiant.blogspot.com/2015/02/what-lent-looks-like.html

Give Up & Take Up youth lesson on Lenten Sacrifices. 
***This post also contains links to some of my favorite Lenten videos and online resources.
http://looktohimandberadiant.blogspot.com/2015/02/lent-youth-group-lessons-links-and.html

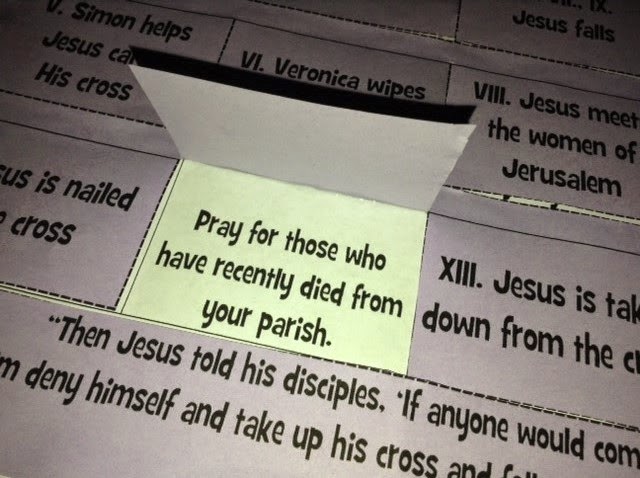
Youth Group lesson connecting the Stations of the Cross and Lenten acts of mercy:
http://looktohimandberadiant.blogspot.com/2014/03/using-stations-of-cross-as-inspiration.html

Youth Group lesson connection the Passover and the Passion, using the movie Prince of Egypt:

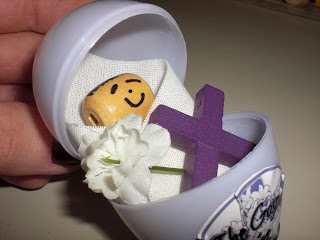
The Gospel in an Eggshell: Connecting the infant Christ with the Christ that died to give us eternal life- great especially as we have such a short time between Christmas and Lent.
http://looktohimandberadiant.blogspot.com/2012/02/gospel-in-eggshell.html

 Ideas for making your own Resurrection Eggs, which are great to tell the story of Holy Week:
http://looktohimandberadiant.blogspot.com/2012/02/get-ready-for-lent.html

New Life Seed Printable:
Great for making the connection to "unless a grain of wheat falls to the ground and dies, it bears no fruit."  Plant the seeds, see them die, have flowers by Easter!
http://looktohimandberadiant.blogspot.com/2012/03/new-life-seeds.html